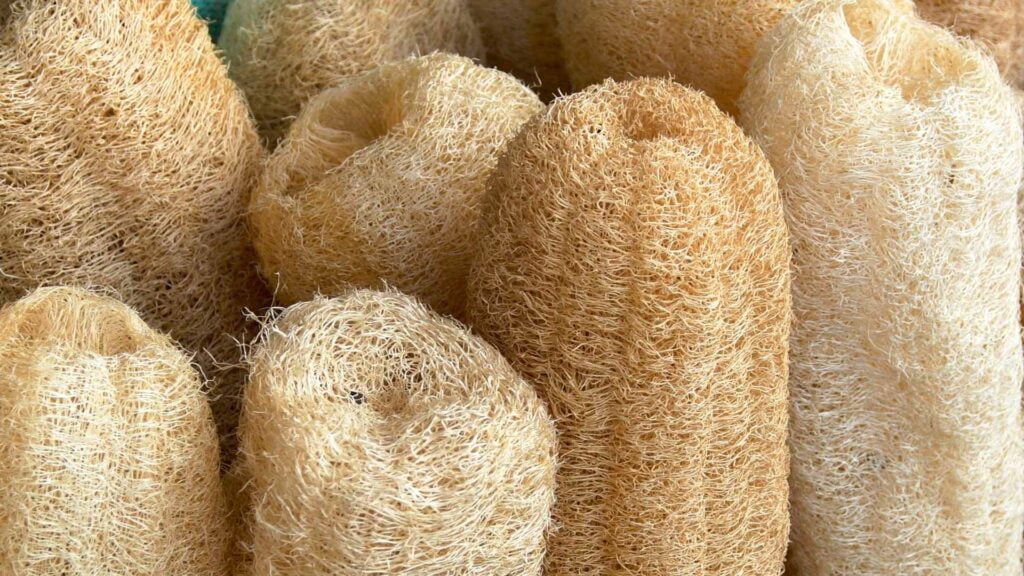
The first time I saw a luffa I thought I was looking at some kind of coral or sea sponge, so I was baffled when I learned it was actually a vegetable, and more specifically a kind of gourd! I was definitely relieved to know that these weird objects are not actually sourced from coral reefs (which definitely need a break from human activity) and that you can actually plant them in your backyard. Luffas have many properties and benefits, they have been used throughout history by different cultures and recently they have been receiving a lot of attention since they represent a sustainable alternative to many plastic products we use in the kitchen and bathroom. In this article you will learn everything you need to know to become a luffa expert, you’ll be able to plant them in your garden, harvest these unique vegetables and take advantage of each of their applications!
Get to know your luffa in 5 facts
- Luffa has MANY names. The word „luffa“ (which can also be spelled as loofa, loofah or luffah) comes from the Egyptian Arabic and was used by European botanist to manly describe two species of plants: Luffa acutangula and Luffa aegyptiaca. There are many other common names such as: Egyptian cucumber, sponge gourd, Chinese okra (used in the USA) or estropajo (in Spanish-speaking countries).
- Luffa belongs to the cucumber family of plants. Luffa is within the Cucurbitaceae plant family, having genetic similarities with pumpkins, zucchini, melons, squash and cucumbers. Some sources recognize up to 7 different species within the Luffa genus, but only 2 of them are domesticated.
- They are native to Central and South Asia. Even though the scientific name of the Luffa makes reference to Egypt, they are actually from Central, South and Southeast Asia. Nowadays they are grown across the globe, preferring warm and tropical climates, but they can also be cultivated in colder weather.
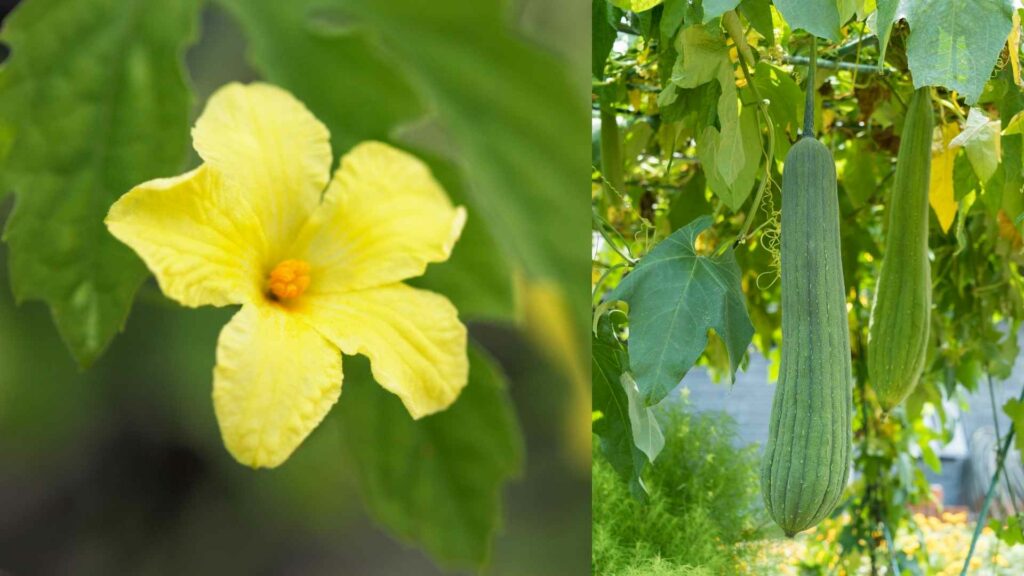
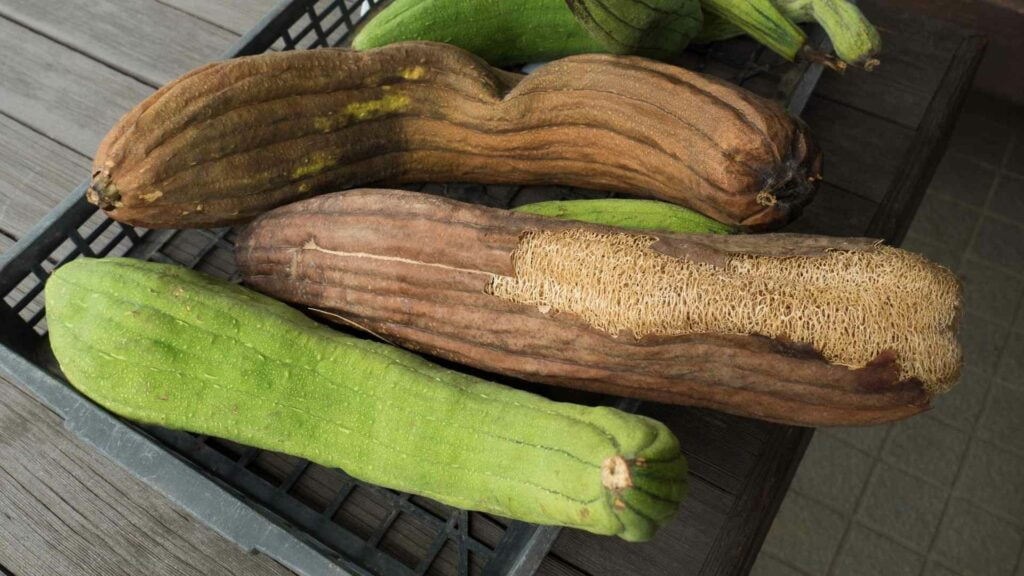
- Luffa is a vine. In proper conditions the luffa plant can take over a large amount of space in no time, they are known for growing like crazy! They have beautiful yellow flowers (a great option if you want to add color to your garden), when these are pollinated they become green vegetables similar to zucchinis and when fully ripened the fruit becomes brown and extremely fibrous.
- The young luffa fruit is edible. Unlike its fully ripened form which is impossible to eat (please don’t try it), the young fruit (measuring around 30 cm) is an important ingredient in many culinary cultures. It’s used as an ingredient throughout the Indian subcontinent, Vietnam, China, Japan, Philippines, Indonesia, Thailand and Timor-Leste. They are used in stir-fry dishes, soups and curries, just in the same way you would cook pumpkin or squash, however the flavor-profile is closer to the one of zucchini.
How to grow your own luffa plants
Since luffa is a plant that prefers hot weather, if you live in a colder region with a harsh winter season, you will need to take a few extra steps in order to succeed in your cultivation. But don’t worry, once the plant has taken hold of its ground there will be no way to get it to stop growing! Below you will find all of the necessary steps you need to follow for your luffa plants to grow healthy and strong:
- If you live in a cold zone you will need to germinate your seeds indoors. Since luffa is a tropical plant that lives in hot weather it can easily die because of frost. Luffa has a long growing season, it is best to plant them between March and April (8 weeks before the last frost date).
- It is recommended to soak your luffa seeds 24 hours before you plant them. Keep in mind that young luffa plants are quite delicate to transplant shock, so instead of planting them in small containers, you should use medium size pots so there is no need for an early transplant (using some kind of biodegradable pot would be even better). Bury your seeds between 1.5 and 2 cm deep and water properly.
- Since germination rate is low in luffa plants, you should plant more seeds than you actually need. Germination temperature should range around 26-30ºC. When your seeds germinate be sure to remove the weaker plants in order to allow enough space for the best seedlings.
- Allow your young luffa plants to grow indoors until they have many leaves and get sturdier. Once the risk of frost is non-existent and outdoor temperature has reached around 20ºC (End of May or early June) it is time to transplant the luffas to their definitive spot. Before doing so, it is best to harden off your plants in order to avoid transplant shock.
- For hardening off your luffa plants you should GRADUALLY expose the plants to direct sun and to outside temperature. For the first days take the containers out and put them in the shade for a few hours, then proceed and place them in the sun just for a couple of hours at a time. If the nights are still very cold you should bring the plants inside. Make sure to be very observant of any stress signs. Once the plants can be outside for an entire day in full sun and spend the night without any issue it is time to transplant them!
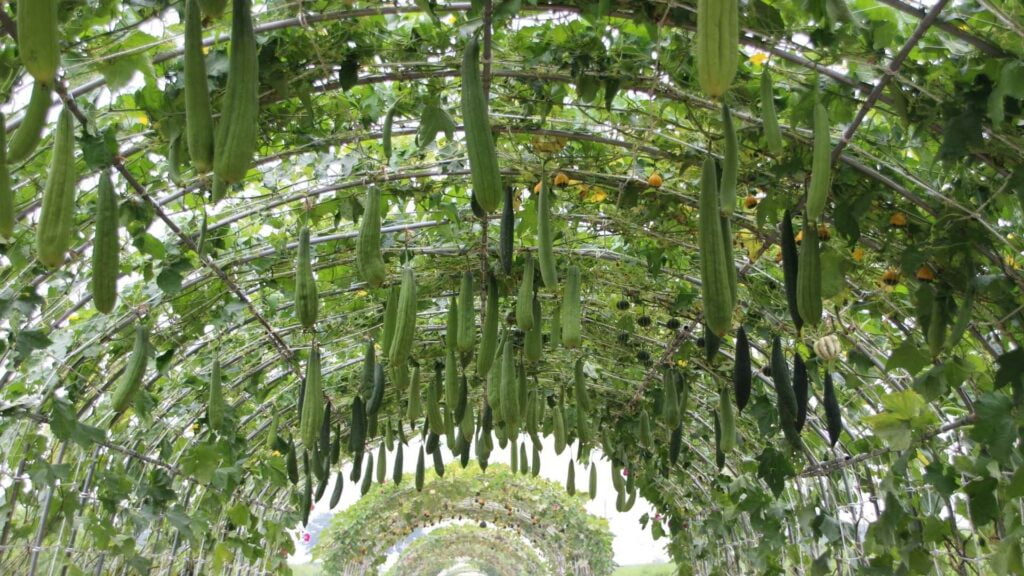
- Luffas are vines and they love to climb so you should provide some form of support. The best option are bamboo poles connected with gardening wire. Other option is to create an arched trellis which will look absolutely beautiful in your garden! Keep in mind that luffas are quite competitive and aggressive vines, so it is best for them not to share a spot with other plants.
- They will need full sun and to be sheltered from strong winds. When it comes to soil, they prefer drained and alkaline soil. Be sure to provide enough water to your luffa plants, this is the key for them to jumpstart their growing stage.
- Once the plant is well established and flowers start to appear you can add some compost or organic fertilizer. Luffa plants have male and female flowers, normally insects will take care of the pollination, in case you don’t have many pollinators visiting your plants you can do hand pollination with a small brush.
- When you see around 5-10 fruits starting to develop in a single luffa plant you should start clipping any new flowers in order to allow the plant to put all its energy into properly mature those fruits.
- If you intend to eat the luffas you should harvest them when they are young and green, if you plan to use them as sponges you need to let them dry out directly on the vine (until they are brownish and fibrous). However, if there are frosts ahead in your area you should harvest all of the fruits (even if they are still green you can manage to get a good sponge). Harvest time should be around October.
- After processing your luffas save the seeds for the next season! Get them dry with a kitchen towel and store them in a dry, cool, dark place.
How to process luffa for obtaining sustainable sponges
There are many techniques for processing luffa fruits and transforming them into useful eco-friendly sponges. Basically the process can be summarized in the following steps:
- Peeling: First of all you need to crack the skin of the fruit in some way, some prefer to bang it against the floor or a tree; you can also press it down with your hands. Once there are enough cracks in the skin you should try to get your fingers under the skin and push through all the way to the other side of the fruit, this should easily separate the skin.
- Removing seeds: The banging method can also be useful for removing seeds. If you don’t feel energetic enough for doing that you can also rinse it with water. In case some of the seeds are reluctant to get out, just leave them and once you dry the fruit they will come out more easily.
- Cleaning: You can leave them submerged in soapy water for a whole day (you can add a tablespoon of bleach just to be sure they are absolutely sanitized). Then rinse them in your sink. You can also put them in the dishwasher.
- Drying: After cleaning them, the easiest way to dry your luffas is to place them in a very sunny spot, you can also put them inside your oven at the lowest possible temperature.
Remember you can experiment and find your own way of doing this process! There’s no definitive method, you are completely allowed to get as creative as you want. Just for you to have a better picture of this, here’s a video showing how Haley from the YouTube channel StoneAgeMan takes care of the luffa processing in her garden:
How to use luffas in the house
Once you have your luffa sponge ready you can shape it with scissors or a sharp knife. You can make thin slices or thicker portions depending on what you are planning to use them for. Here are some of the ways in which you can use your luffa products at home:
Kitchen
- They are amazing for scrubbing the dirtiest pots and pans
- Cleaning up vegetables
- Scrub your surfaces and tiles
Bathroom
- Use them in the same way you would use a scrubber or bath sponge. Luffas are nature’s response to our bath plastic puffs!
- Exfoliate your skin with your luffa adding your favorite cleansing product (they are great for stimulating blood circulation!)
- Perfect for cleaning up the bathtub or your bathroom sinks

Tips for taking care of your sponges
- You should clean them with soap or in the dishwasher constantly. If you see that they have any food waste stuck inside of them, or if they look old and dingy, it is time to put them in the compost bin!
- It is important to let your luffa sponges dry between uses (hanging them outside the bathroom is the best alternative), you can also make sure they are dry by patting them with a towel. For avoiding any mold or bacterial growth, don’t store them anywhere moist or damp.
- Since luffas are made with natural fibers they are not meant to last forever! It is advised to renew your luffa products on a monthly basis.
- Your old luffas can go directly to the compost bin or just bury them in the ground of your garden. They are 100% biodegradable.
If you end up with dozens of luffa sponges after harvesting season a good idea is to give them as gifts to your friends and family! It would really be a unique eco-friendly present, you can pair them with a unique soap or another bath amenity. If you want to keep them for yourself there is no issue with that since they can last for years if they are properly stored in a dry place!
Luffa products
If gardening is not your thing or if you don’t want to wait 8 months for enjoying the benefits of luffa products we have some amazing options for you! You can enjoy them in your bath or kitchen and then feed them to your compost bin!
Luffaschwamm Pad als Massage- und Badeschwamm
Luffa Seifenablage
Eco Schwamm 100% natürlich im Doppelpack
Conclusion
Luffa is really an exceptional plant! Besides being useful in our kitchens and bathrooms, there is ongoing research that shows that the sponges made from luffa fruits can be used for filtering water and to produce helmets or armored vehicles because of their shock-absorbing properties. Different parts of the plant have shown to have remarkable medicinal properties such as treating diabetes, hemorrhoids, headache, arthritis, muscle pain, colds and sinus issues. These healing properties are attributed because many substances known as „phytoconstituents“ have been found in the plant, ranging from anti-diabetic, anticancer, antioxidants, antibacterial and anti-inflammatory, among many others. Luffa oil is also known to be a great fertilizer.
These are just a few of the things that show the great potential of luffa as a plant! We hope this article got you inspired and wish you add luffa sponges to your daily life instead of plastic!