
You have probably seen them before. At the organic supermarket or in the trendy plant-based restaurant in your neighborhood. And maybe your health-conscious friend has already lectured you about how much they love to sprinkle them on everything. Perhaps you have felt a bit puzzled by this particular food trend, wondering what are these tiny plants really? Well, it is very likely that all of these situations have to do with microgreens. Since the 1980’s and 1990’s different chefs started to use this kind of produce in their restaurants, triggering a huge food trend throughout the world and increasing the interest in this new way of eating veggies. Microgreens is one of the buzzwords that emerged for referencing these eye-catching young plants.
After reading this article you’ll become an expert in this subject and you’ll be ready to grow your own at home. Get ready to surprise all your friends with these miniature nutritional powerhouses that can give an upgrade to any dish you make!
What are microgreens?
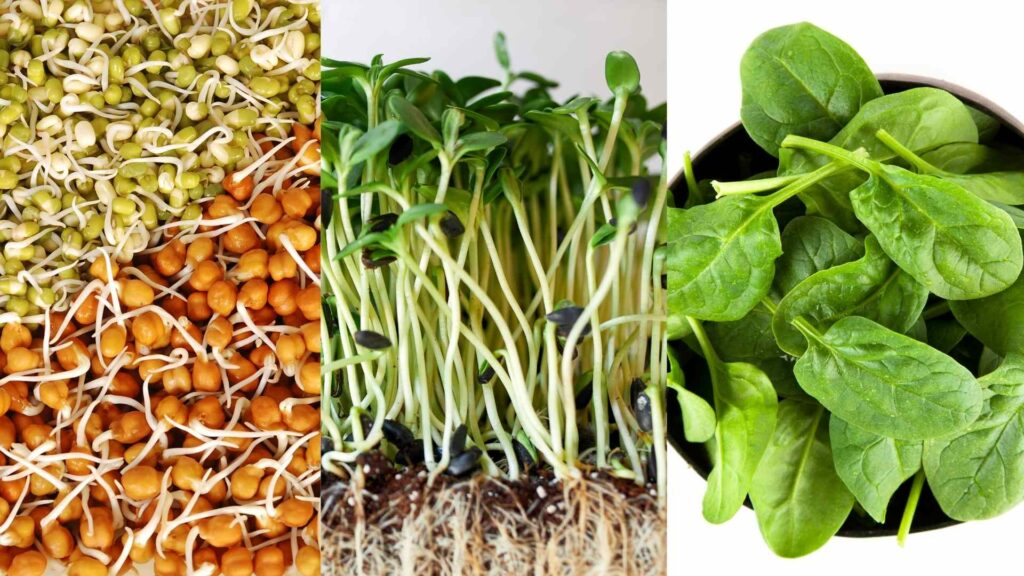
Defining microgreens can be a bit tricky because there are other products that look similar but that are branded as sprouts or baby greens. Bottom line, they all are small edible plants, but with substantial differences:
- Sprouts: These are the first stages of a seed that has germinated, the first leaves (called cotyledons) are starting to develop, the plant is still not able to photosynthesize, instead it feeds itself through the stored nutrients within the seed.
- Microgreens: After a couple of weeks, the sprout will grow some real leaves and the plant will start to look green since it is now able to photosynthesize, this would be considered a microgreen.
- Baby greens: If more time passes then the plant will be more leafy and closer to its fully-mature form, this is the baby green stage.
As you can see it’s all matter of timing! Since the confusion between sprouts and microgreens is more prevalent, here is a chart for you to see the most important differences between them:
| Sprouts | Microgreens | |
| Harvest time | 3-5 days | 1 to 3 weeks |
| Growth medium | In water (mostly in jars) | Soil (trays) or hydroponic |
| Light conditions | Doesn’t require light | It needs a good amount of sunlight |
| Edible parts | The whole sprout (including seed and roots) | Just the upper part of the plant (leaves and stem) |
| Seed options | Limited to seeds that are edible in that stage of growth | More versatile, this list includes up to 87 types of plants that can be grown as microgreens! |
| Nutrition benefits | Good source of antioxidants and amino acids, low in calories | High content of carotenoids, chlorophylls and organic acids, rich in vitamins and minerals |
| Flavor and texture | Mild, crunchy texture | Strong flavor, aromatic, attractive colors |
What are some of the benefits of microgreens?
To really understand the huge attention that microgreens are receiving at the moment we have to consider some fundamentals about plant biology. In the early stages when a plant is preparing to properly develop, they begin to turbo-charge their systems with nutrients and minerals in order to trigger the next stage of growth. When a plant is fully mature, it will channelize its nutritional energy towards reproduction so the production of flowers will be their top priority. If we consume plants in this early stage, we will be receiving all of their benefits condensed, some scientific research has even pointed out that microgreens could have a greater nutritional value compared to the mature plants. These are some of the potential benefits of consuming these nutrient-dense greens:
- Perfect timing: Great number of bioactive compounds in this stage of plant growth, which can provide antioxidant properties, removing waste molecules (free radicals) from our organisms.
- Brimming with goodness: Microgreens are rich in vitamins (A, C, E, and K), minerals (iron, potassium, zinc, magnesium, copper), each plant has a different profile and they can be tailored for specific needs.
- Anti-everything: Microgreens have anti-inflammatory, anti-carcinogenic and anti-hyperglycemic properties, thanks to the phenolic and flavonoid compounds that can be found in these young plants.
- Perfect for weight loss: Microgreens have a significantly low caloric count, so you can eat them without restrictions!
- Preventing chronic diseases: The abundance of phytochemical substances in microgreens could be used for preventing and treating chronic diseases (obesity, type 2 diabetes and cardiovascular diseases)
These are other benefits (not related to health) that can be attributed to the microgreens culture:
- Fresh greens all year round: Microgreens are probably the easiest way to grow your own food! You can plant them all year long besides a window (no need of a big garden) and they don’t require much attention.
- It’s best to go DIY: Instead of buying them at the supermarket, you should grow them in your house, it is extremely low-cost and perfect for urban spaces since it doesn’t require much room.
- Transform a boring sandwich into a 3-Michelin-star dish: With these greens you can give any dish strong and unique flavors, amazing color and interesting textures, you will never be bored again from cooking at home!
- Friendly with the planet: growing ANY kind of food at home is an excellent way to be sustainable and eco-friendly. By transforming your home into a mini-farm you avoid the plastic waste used in packaging and the carbon footprint is basically zero since there is no transportation involved!
From A to Z: How to grow your own microgreens at home
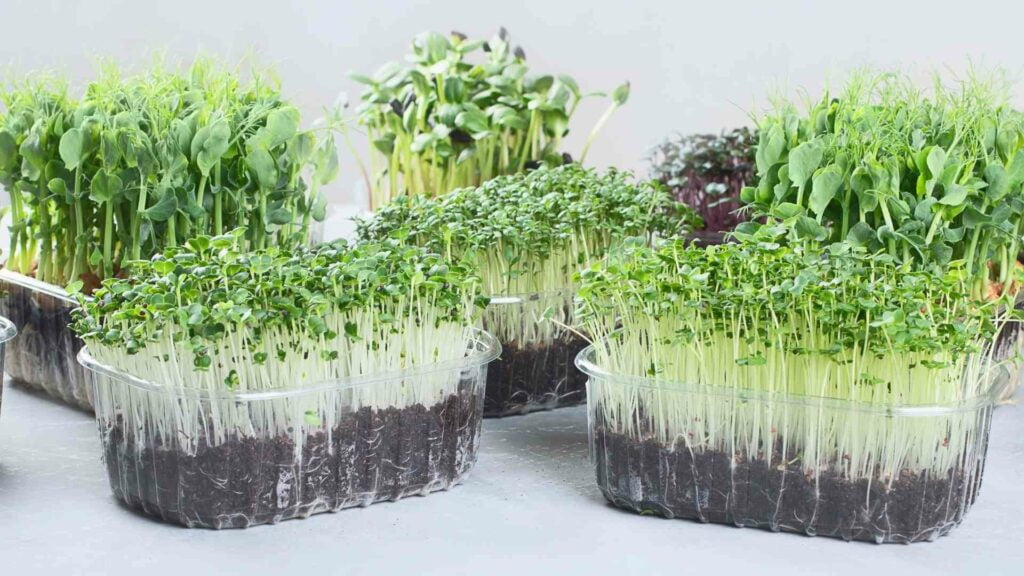
Growing microgreens in soil
Now you have all the basics! The next step is to do it yourself, below you will find a detailed guide for growing your own microgreens at home. This particular method uses soil as a growth medium and it’s completely beginner-friendly. Other techniques, such as hydroponics, may require more specialized equipment and constant care, so it’s advisable to give it a try once you’re more experienced. Let’s get down to work:
Things you will need: seeds, potting mix + compost (optional), containers (trays are the best option), mister/spray bottle, plastic bag or clear lid
- Fill your containers with a layer of potting mix and compost. It is better to use flat containers such as trays instead of normal pots so you don’t end up wasting growing medium. Instead of buying new plastic trays you can reuse what you have at home (take-out food containers work well) just be sure everything is super clean and that it has good drainage.
- Read the seed packet and check if there are any special needs for the germination of the plant you selected. Some seeds need to be soaked for a few hours before being planted; others need to be covered completely with soil when sowed, in contrast there are some seeds that just need to be placed on top of the soil and moistened with water in order to germinate.
- Distribute your seeds across the soil, be sure to use the entire area of the tray. Don’t worry about leaving space between seeds, no problem with over-crowding when growing microgreens! Once your seeds are in place use the spray bottle in order to moisten the entire tray with water.
- Cover your trays with a lid or with a similar tray, if you don’t have any available you can use a plastic bag. By covering the trays you will provide a dark and warm environment which is ideal for germination, this process will take between 3 to 7 days (it depends on each species of plant). Be sure to check them a couple of times every day just to make sure the growing medium is moist (but not soaked).
- Uncover your trays when germination is complete. You will know it is time when sprouts have risen a few centimeters and the first leaves are fully developed. Place your trays in a place where they receive a good amount of sunlight. Good ventilation is also important at this stage of growth. When watering your microgreens be sure that there is no excess moisture (we want to avoid the appearance of mold at any cost!). Check them twice a day.
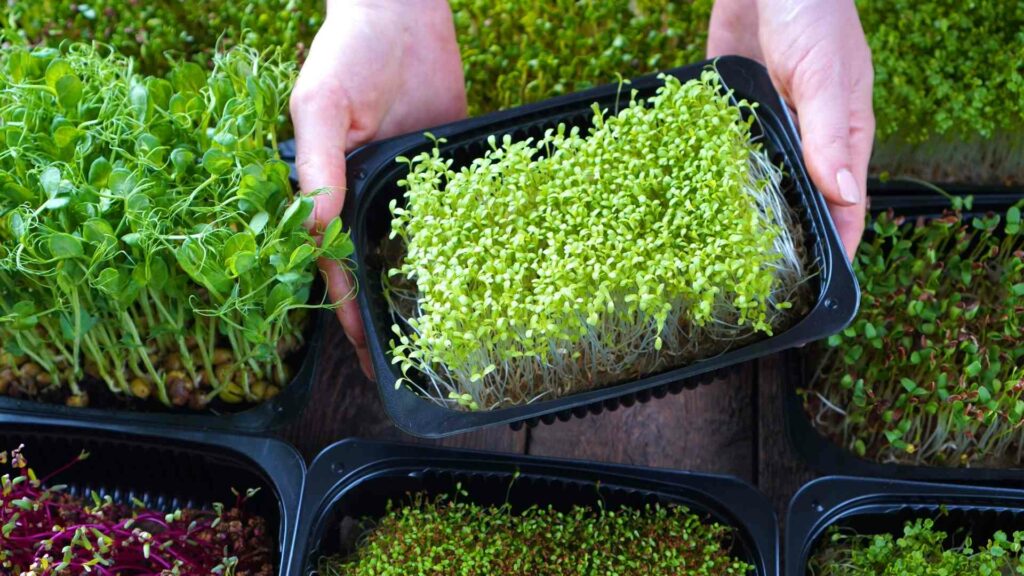
- Finally, harvest time! After a couple of weeks your microgreens should have fully developed baby leaves (cotyledons) and some young leaves starting to grow, this is perfect time for harvest. Just use a clean pair of scissors and cut around the base of the plant, near the soil. Microgreens that are ready to harvest measure around 10 to 18 cm.
Additional tips:
- When to eat them: It is better to consume your microgreens right away, otherwise they can wilt and lose their nutritional value.
- How to eat them: In order to maintain their full nutritional potential it is best to eat them raw, avoid cooking them. Below there’s a cooking section with ideas for yummy recipes you can try out.
- Storage: If you’re not going to eat them immediately, you can store them for up to 2 days in the fridge. Put them inside a sealed container with a paper towel in the bottom. It is advisable to get rid of any excess moisture by using a salad spinner before storing them.
- Food safety: Please wash your greens before eating them, it is very important to get rid of any traces of soil or compost, no one wants dirt in their salad! Also if you used any sort of fertilizer be sure to rinse your microgreens as best as you possibly can. Use cold water when rinsing them in order to prevent any wilting.
What kind of plants can I grow as microgreens?
The possibilities are endless! Here are some ideas of vegetables, herbs and other plants that can be enjoyed as microgreens:
- Mint family (Lamiaceae): chia, basil, mint, sage, rosemary, oregano, sage
- Grass family (Poaceae): barley, corn, rice, oats, wheatgrass, millet
- Pea family (Fabaceae): beans, chickpeas, lentils, soy beans, peas, alfalfa, fenugreek
- Parsley family (Apiaceae): carrot, dill, fennel, celery, cilantro
- Mustard family (Brassicaceae): arugula, broccoli, cauliflower, mustard, watercress, kale, cabbage, radish
- Amaranth family (Amaranthaceae): amaranth, quinoa, swiss chard, beetroot, spinach, quinoa
- Leafy greens (Asteraceae): lettuce, chicory, radicchio, endive, sunflower
- Garlicky plants (Amaryllidaceae): garlic, onion, shallot, leek, scallion, chives
Cooking time: 10 recipes & ideas for the kitchen
After harvesting your first tray of microgreens you will end up with a big amount of produce in your hands. Don’t feel overwhelmed by that huge mountain of tiny radish greens! With a bit of creativity you will find a good use to them while enjoying delicious food. Here are some recipes that will give you ideas of how you can use them in your daily cooking:
Salads
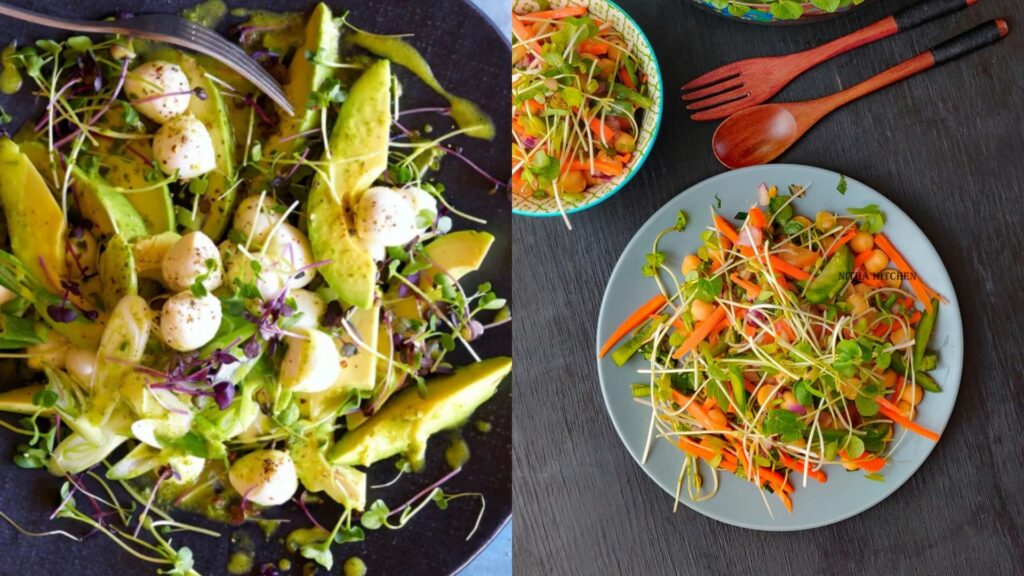
Mozzarella and avocado salad with microgreens. From: Migusto
Asian microgreens vegetable salad. From: Nitha Kitchen
Sandwiches, wraps and hamburgers
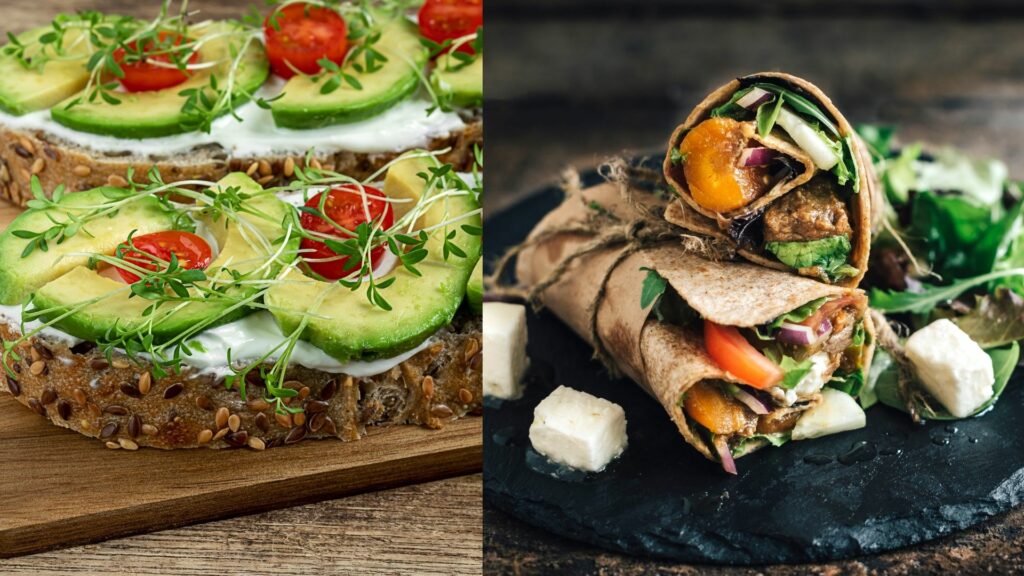
Bittersweet winter veggie wrap. From: West Coast Seeds
Avocado toast with microgreens. From: A Food Lover’s Life
Juices and smoothies
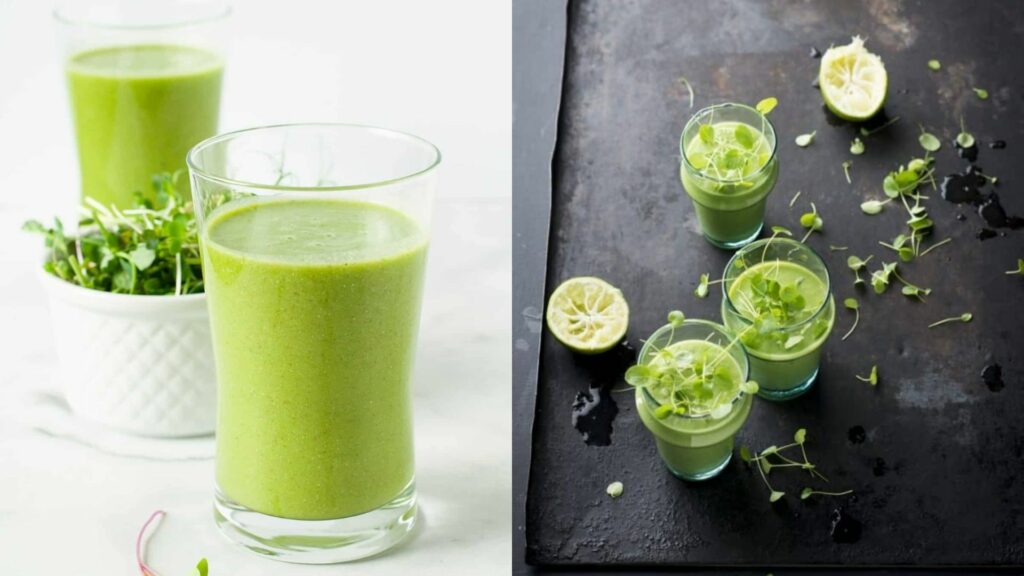
Pineapple orange green smoothie with microgreens. From: Flavor & Savour
Cress smoothie with avocado and apple. From: FOGS Magazine
Toppings and garnishes

Peach, ricotta pizza with spicy microgreens. From: How Sweet
Scallop, farro, microgreens and lemon basil sauce. From: Taste With The Eyes
Breakfasts and desserts
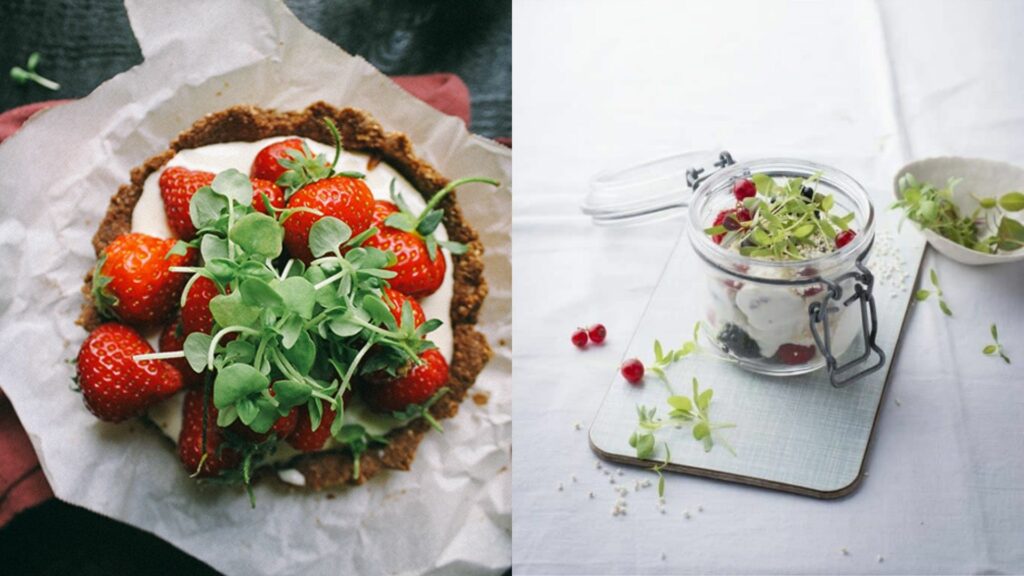
Mini strawberry chocolate tart with whipped goat cheese and basil micro greens. From: Vegetarian Ventures
Breakfast quark with oatmeal, berries and amaranth leaves. From: FOGS Magazine
Microgreens near from you!
We have made a small list of speciality shops and producers in Switzerland that sell an amazing variety of microgreens. For our readers who work with food at restaurants or catering, this could be an outstanding resource for sourcing unique products to include in your dishes! Also, if you’re not proud of your gardening skills and don’t feel patient enough for waiting 3 weeks in order to have some greens available in your kitchen, you can also buy them directly from these local producers! Check them out and support their amazing work:
- UMAMI | Badenerstrasse 569, 8048 Zürich
- Eschbach Gemüsebau | Im Leimen 24, 4414 Füllinsdorf
- Marinello & Co. AG | Aargauerstrasse 1A, 8048 Zürich
- YASAI | Lessingstrasse 5, 8002 Zürich
- Espro Sprossen | Zelgstrasse 93, 3661 Uetendorf
Conclusion
As you can see, growing microgreens in the comfort of your own home can be an amazing opportunity for having fresh produce available in your kitchen all year round. It is very cheap, practical and you don’t have to be an expert gardener to succeed; you can even involve your children in this project, they can learn a lot with these real examples about how plants grow and develop in a very fun and interactive way. The other positive aspect is that you will probably never get bored! Since the options of seeds you can experiment with are endless, you are sure to find your favorites in no time. Let us know if you have any questions, or leave a comment with your favorite plants to grow as microgreens!